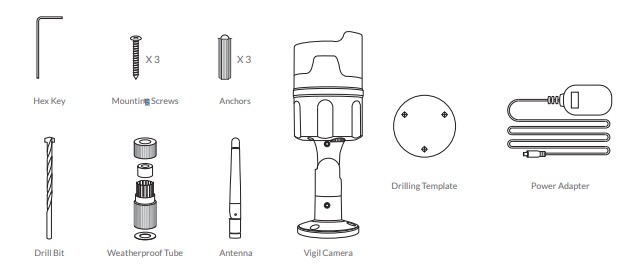
In order to install the Netvue Vigil camera, it is necessary to know a little about the camera first. It would be more correct to start by knowing the parts of the camera, what are the cables, what comes out of the box, what are the mounting apparatus?, How to insert the Micro SD card card.
We intend to explain the installation of the camera to you with visuals. Later, it will be explained how to connect the Netvue camera. We will also explain the wired and wireless connection on the netvue application.
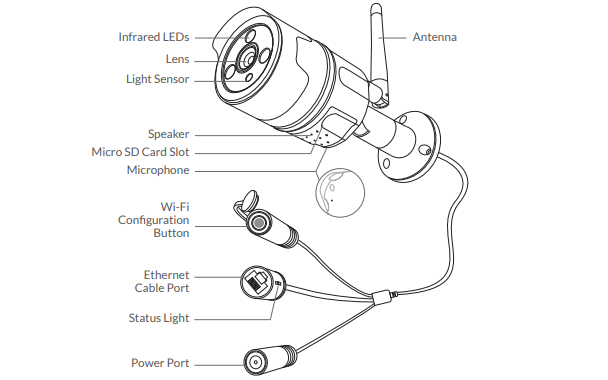
How to Insert Micro SD Card into Netvue Camera
Vigil Camera comes with a built-in card slot that supports up to 128GB, as soon as you insert your Micro SD card, all camera views and video recordings will automatically start to be stored in the SD card.
Unscrew the SD card cover, lift the cover gently and insert the SD card into it and tighten the screws again.

How to setup Netvue Camera
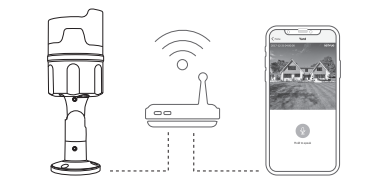
Create an account for yourself by downloading the netvue application from google play and apple application market. Give all the information and permissions the application asks for. This information is for the healthy operation of the application. You do not need to hesitate to give your location information etc. You can install the camera wired or wirelessly.
Wireless Connection: In this, you should set your wifi router to 2.4 Ghz and connect your camera to this network. You can use it by logging in with the user and password you created specifically for this. The point to note here is that if the devices are close to each other during the first installation, you can do the installation easier, if you do not have such a possibility, the wifi signal strength should always be high so that the camera works properly. If your router and camera are not close to each other, then the signal will decrease and problems such as disconnection may occur. Either you will keep your camera close to the router or you should use devices such as wifi repeater and extender to expand your wifi network.
Wired connection: Actually, you can think of camera setup as PC setup. If your wireless network is weak and you cannot amplify the wifi signal, use the wired connection. In this you need to extend a cable up to the camera. You can do it simply by following the installation steps through the application.

Adding Your Vigil Camera to the App
1. Download Netvue App from App Store
or Google Play on your phone.
2. Login to your Netvue account or create a new account.
3. Tap “+” to add a new device.
4. Select your camera from the product list that appears.
“Outdoor Cameras” – “Vigil Camera”.
5. Scan the QR code on the back of Vigil.
6. Choose a connection method, “wired” or “wireless”

After choosing your connection type, the application and your camera will start working. At first it will show you a test preview so you will see your camera working. Then you can make the settings you want through the Netvue application. In other words, you can make the changes you want to send notifications, motion detection and night vision settings as you wish.
Not working yet