Regardless of the model of your Tp link Tapo camera, the installation process is the same. Whether it is Tapo C200, C210, C310 or Tapo C110, the procedures are the same. The first thing to do is to download the Tapo app from the Apple market or Google play store.
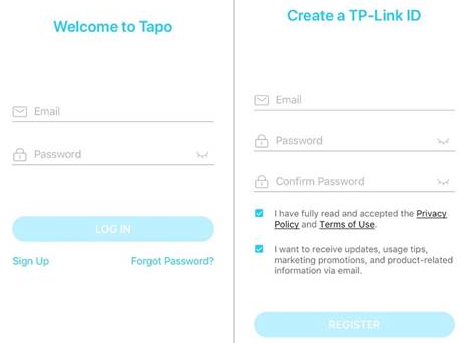
You must have a TP LINK ID to log in to the application you downloaded. You can register when you download the two applications. You can register by entering some information such as name, e-mail address, location. If you have registered before and do not remember your password, you can request a new password to your e-mail address from the forgot password section.
First, open your app and tap the + tab on the home screen. Select your device from the drop-down list. smart camera..
Plug in your camera, wait about 30 seconds until the LED flashes red and green. Then continue. Then it will ask for permission for location access. You must give this permission for installation, then you can turn it off if you want.

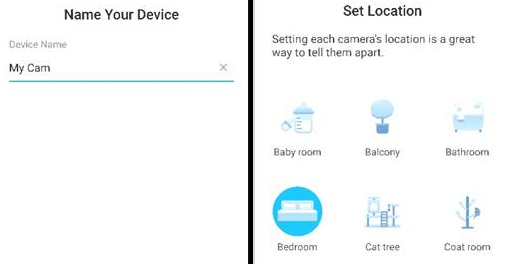
It will now search for your camera.After you find your camera application, open your wifi network list and connect to your home wifi network by entering your password. Pairing will start automatically after wireless connection is established. This process continues until the LED light turns solid. Then the pairing is complete. Now you have to give your camera a name and specify its location. such as “balcony pet camera”
Now the installation is finished and you can start using your camera. If you are having a problem with the camera setup or configuration, you can try these steps for troubleshooting;
To reset your device: Reset the camera by pressing and holding the RESET button for more than 5 seconds until the LED flashes red.
If you are having a problem with your wifi network, move your camera closer to the router, check the wifi password, remove and re-establish the connection, if these did not resolve the situation, you can try to establish a wireless network connection from another phone.
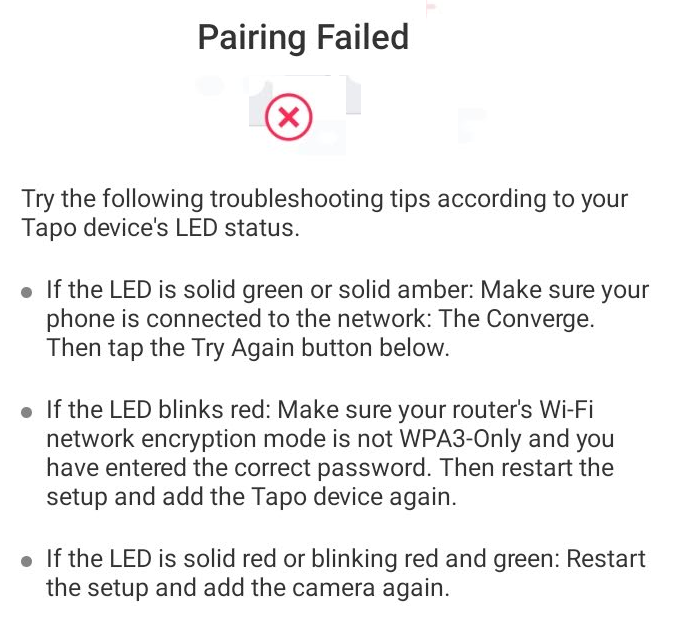
If you cannot find your wifi name in the list; It is recommended to change your wifi settings to 2.4 GHz wireless channel 1, 6 or 11 on your router. Refresh your wifi list a few times. If the SSID of the router is hidden, please select “Other” to manually enter the Wifi name SSID and password.
If you cannot continue with the institution process; Wait 2 minutes and follow the LED indicators. When the LED is solid green, the connection is successful. You can observe your camera and adjust its settings through the application. If the camera is connected to a wifi range extender device, you can try to connect your device to the main wifi network.
Detectar cámara wifi c210