Blink camera has many models. Whichever device you have, the setup is usually the same. Whether you have a
Mini Pan tilt, outdoor, videodoorbell, floodlight camera or indoor camera, you will be able to install it easily as we mentioned below. If you want, you can do a test of your camera by downloading the application before installation. It helps you to test the product from local stores and buy it that way even at the purchasing stage.
For Blink camera installation, you first create a blink account. As in every company, it is necessary to create an account in the company before using the product. When opening a Blink account, you create the account by entering your country, e-mail and sms information. Having information is also important for you in terms of updating and communication. To open a Blink account, you download the relevant application from the application markets and open it.
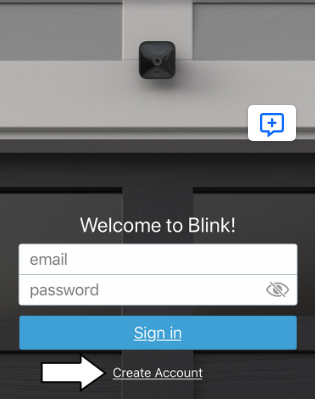
When creating the account, you need to make an sms confirmation. Now, in terms of security, many companies do not allow account login with two-factor authentication, that is, without sms confirmation. Since Blink cameras cooperate with Amazon, for example, if you use amazon alexa, you can log in to your blink camera account with your Amazon account.
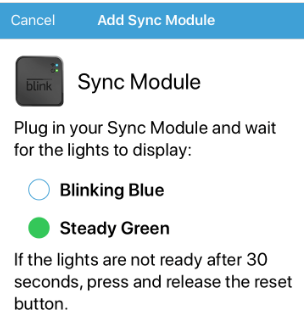
Add a Sync Module and create a system
From the home screen, tap the
Add Device + icon.

After adding your device, the device name will appear on the screen that opens. If there are many devices connected to the account, you need to choose which device you will use. The app will ask for some permissions. Grant these permissions, such as image capture and camera/lens use. There is a serial number on the back of your device. You can check it out there if you need it.

Now you have to give your camera a name. From here, it is important to name someone according to your intended use of the camera, so that there is no confusion if there is more than one camera at home.
For example, by giving it a name such as
“baby control” or “
salon”, you can choose the name according to where your camera sees it. Then a blue light will flash on the camera, indicating that the connection is being made between the camera and your mobile application. The camera does this by connecting to the wifi network.
You can connect to your wifi network by entering your password on your router’s 2.4 Ghz wifi connection.
After the wifi connection, the synchronization is now complete. The account name you have given in your mobile application is now visible. Now all you have to do is add your own camera from the
+ Add device section on the home screen of the mobile application.
After adding your camera, the serial number of the camera you added will appear on the application. You can add multiple cameras to your system from the +
Add device section. The serial numbers will appear the same for all of them. Whichever camera you add via the application, you can view its images and make the necessary settings.
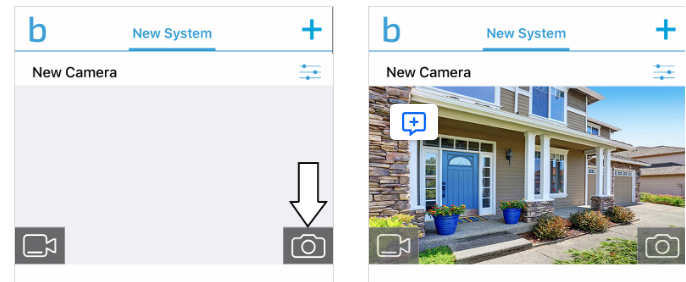
Your camera has started to work as a live broadcast on the screen that opens. Tap the thumbnail on the screen to take thumbnails. You can make settings related to your camera through your Blink account. Many settings are available here, such as adjusting the sensitivity of the motion detection sensor and the notification options you want to receive. If you make the motion detection too sensitive, you will get a constant notification. That’s why these two settings are important.