Regardless of your D link wifi camera model, you can benefit from the information we provide on this page about the installation. For all models such as Dlink DCS-930L -936L, it will be explained how to setup with the setup wizard, setup via mydlink app and then connect with Wi-Fi Protected Setup(WPS).
D Link Wifi Camera Setup via Browser on Computer
First of all, we run the related software by inserting the installation CD supplied with the camera into the computer. Then Open a web browser and access the Camera’s configuration page at: http://192.168.1.157/ .
In browser setup, the default username is admin and the password is blank (blank).

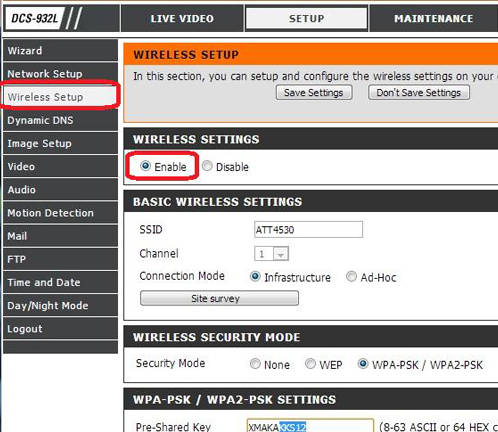
You need to set the image resolution by selecting the video section in this configuration page settings. Here you should set the maximum resolution of 640×480. Then proceed to the wireless network settings. You can continue your process by entering your connection name and password in the wireless network settings.
How to setup Your D link Wifi Camera with mydlink lite app?
We download the relevant application to our mobile phone from application markets or by scanning the QR code in the manual given next to the device. We open the application and first create a Dlink account for ourselves. After creating our account by filling in the necessary information, we approve the permissions requested by the application and we need to make sure that the bluetooth connection of our mobile phone is turned on.
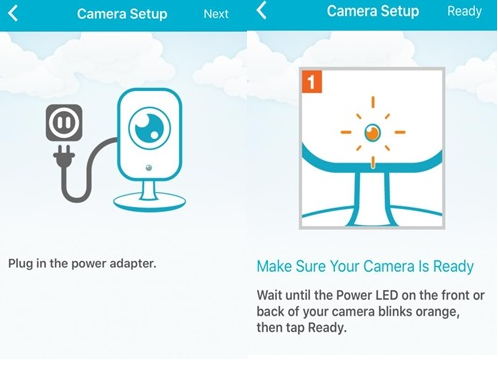
We insert the adapter and wait for the camera to flash orange. We click on the add camera option through the application and enter our camera model
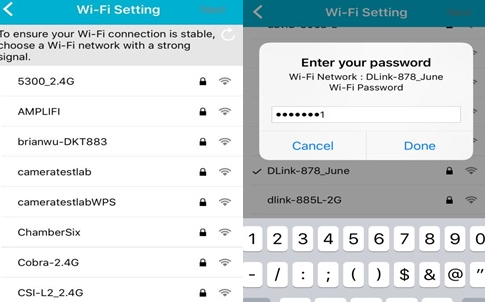
We read the QR code found behind the camera. If this code is worn out or you cannot read it from your device, we enter the pin code on the back of your camera. Then we select our own wifi connection and enter our wifi password.
How to connect your camera with Wi-Fi Protected Setup(WPS)?
It is very easy to connect in this way, but if you are going to install the camera for the first time, we recommend that you create a dlink account by installing through the wizard.
Step 1: Press the WPS button on your camera for 3 seconds. The WPS LED on your camera should start blinking blue.
Step 2: Within 60 seconds, press the WPS button of the router that you want to connect.
Step 3: The WPS LED on your camera will automatically configure its wireless settings, and the WPS LED will turn solid blue, then your camera will reboot and connect to your wireless network.
Note: Depending on the model of the router you are using, whether it has a WPS button or not depends on it. If your modem does not have a WPS button, you must log in to the router interface and activate WPS mode from here.
Dcs930
DCS931L
House camera
Can I set up my dlink camera with out the software cd? I have the D-Link camera model :: Dcs-932L-B1